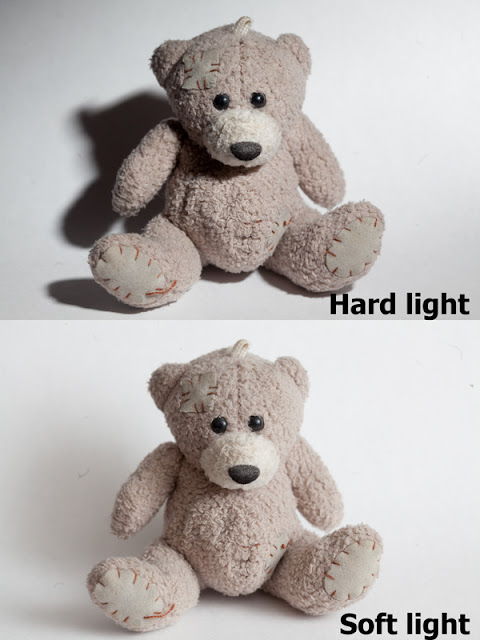
If you are not a photographer, it may come as a surprise that light can be of two types: soft and hard. Soft light does not produce deep, dark shadows. A perfect example is the light on an overcast day, which is diffused and even. Hard light is the complete opposite: shadows are going to be very dark, and sometimes even completely black.
 |
| I honestly wanted to illustrate this concept with a nude model, but, unfortunately, did not have one handy |
This is the reason some vacation photos sometimes don’t look good as people tend to have very strong shadows on their faces.
 |
| Also note the shadow pattern on model's legs. This wouldn't happen if the light were soft. |
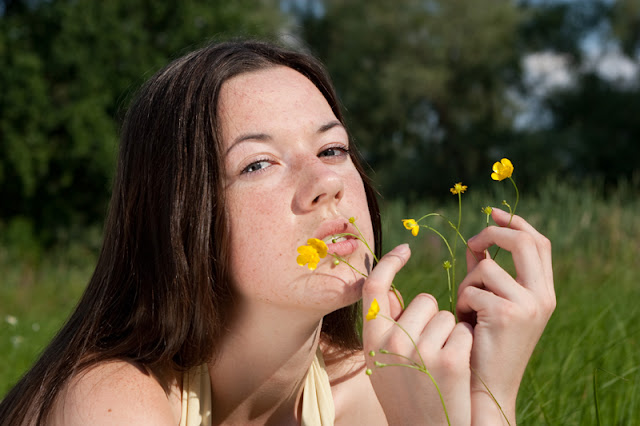
The same theory applies to nude photography-- hard light may produce shadows where they shouldn’t be and add serious flaws out of nowhere. There are exceptions: when you are photographing in dark with only one light source, hard lighting is the only option and it may produce incredible results. Also, when photographing athletes, it is generally better to use hard lighting as, when applied properly, it emphasizes muscle texture and volume.
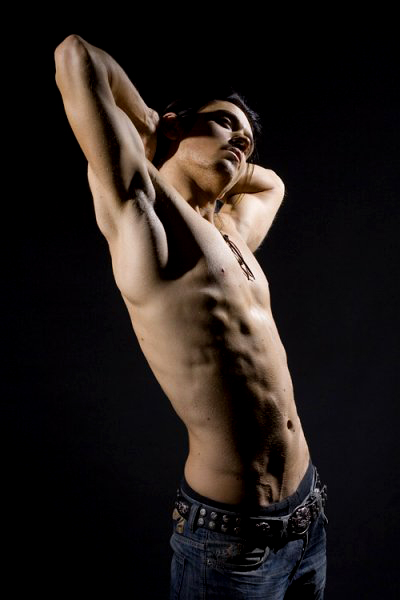 |
| Note the completely black shadows |
So, for most cases your choice should be soft light. Where can you find it? There are a few options available.
1) Shoot in shadow. Even on the brightest, most sunny day, if you place your model in the shadow of a larger object (e.g. a wall, a tree, or a vehicle), she will be properly lit since there is still plenty of light around. This will solve the problem of harsh shadows.
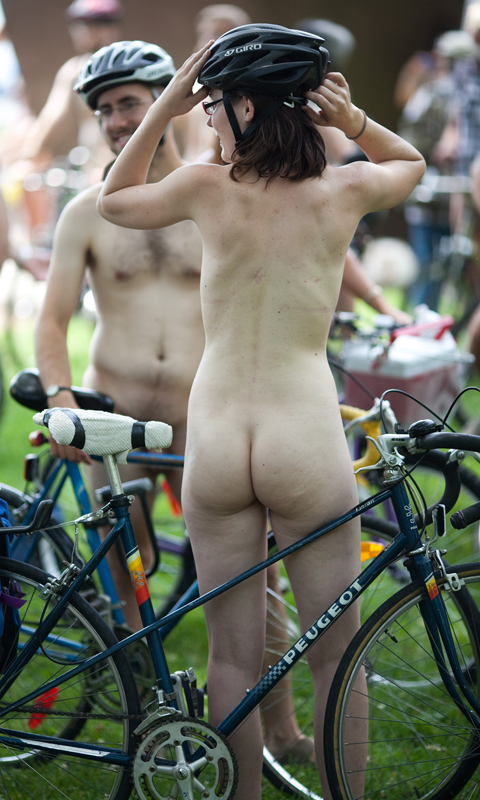 |
| Here is a participant of Toronto Naked Bike Ride under the shadow of a tree, creating nice soft light. |
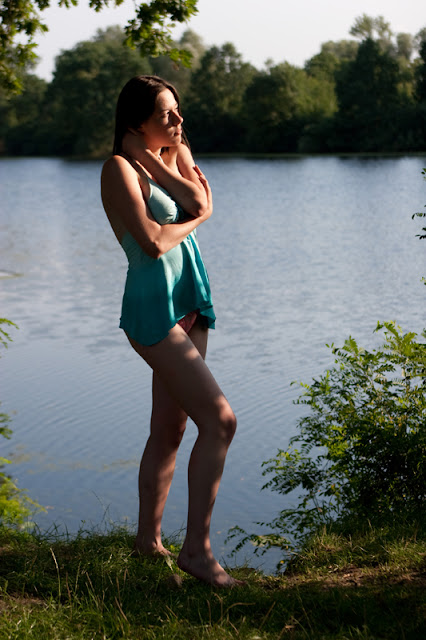
Shoot from the model’s shadow side. Contradicting the common belief that you should not photograph against or into the sun may help you create some amazing photos. An obvious bonus: great rim lighting outlining hair and body shape.
 |
| Note the bright light on the edge of the model's face and on her back. This is typical when shooting the shadow side |
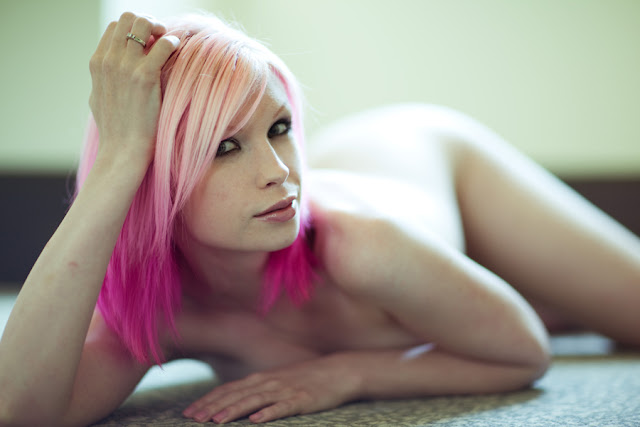
Shoot on an overcast day when the whole sky looks grey. It may seem that everything looks colourless and flat, but this type of lighting is perfect for portraits. You may also (on sunnier days) wait for a cloud to cover the sun.
 |
| Very nice and soft light created by cloudy sky |
When you’re indoors, use a big window. Move closer to the window to get more light for your photo. Here’s an important tip: look for a window that is not on the sunny side of the building. The sun is the most common source of hard light and coming through the window won’t make it any softer; you will get the same dark shadows. If you are shooting next to a shadow side window, you may get some of the most beautiful photos that can be produced indoors.
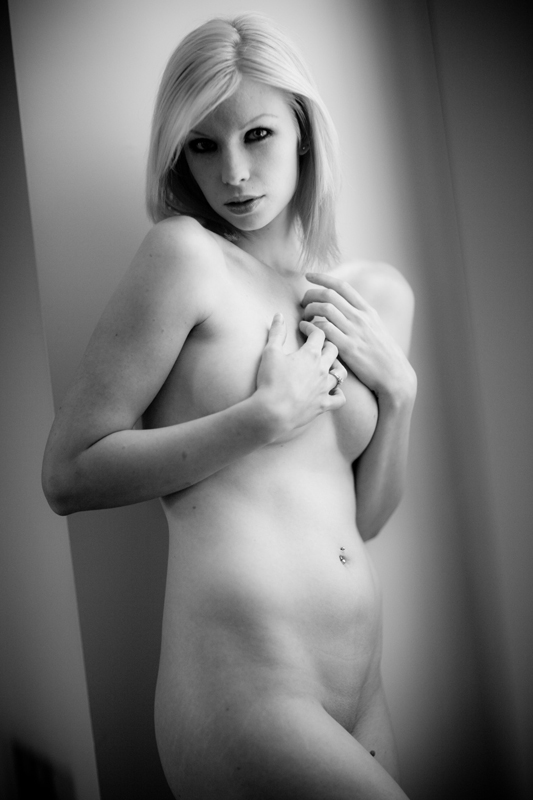 |
| Soft light from a big window. |
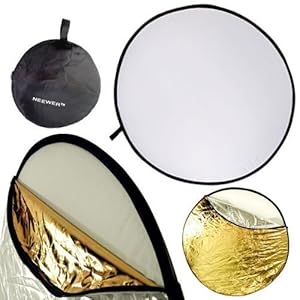
Create good light: use a reflector or a flash. If you don’t have a choice and must shoot in a bright sun, get a reflector.
A reflector is used to create spots of light in order to fill in harsh shadows. Just aim a reflection of the sun at your model, and you will get very nice, dimensional lighting.
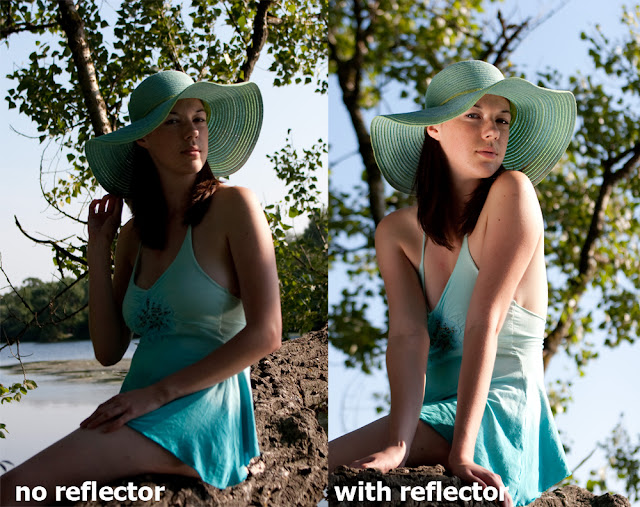 |
| A reflector is the simplest tool for creating professional looking photos |
Sometimes you can use a natural reflector, such as a white wall or a reflective window to fill in the shadows. With some experience, you can get professional looking photos without any extra equipment.
If you don’t have a reflector, you could try to use your camera flash to fill in the shadows. This requires expert knowledge of your camera settings, and a flash powerful enough to make the changes visible.
 |
| To fill the shadows on a bright sunny day, the flash must be really close to the subject. |
Now that you are aware of the different types of light, you will start to notice them, the changes that different light makes to your photos, and what works best. Feel free to submit your photos with different lighting to our
Flickr pool. I will try to give some feedback on your lighting and suggest
possible improvements.